Many girls dream of the long effectively made up nails. However and short can look adequately. Correctly picked up varnish, suitable and accurate manicure will make your hands well-groomed, beautiful and that is important, very natural.
It is required to you
- - base under varnish;
- - varnish;
- - protective upper coating.
Instruction
1. Make manicure in salon or with own hand. Nails have to be well processed – otherwise the most beautiful and quality varnish will look inaccurately. File nails, having given them the desirable form. Soften cuticle special means and remove it baculine of orange tree. If necessary level the surface of nail grinding bar.
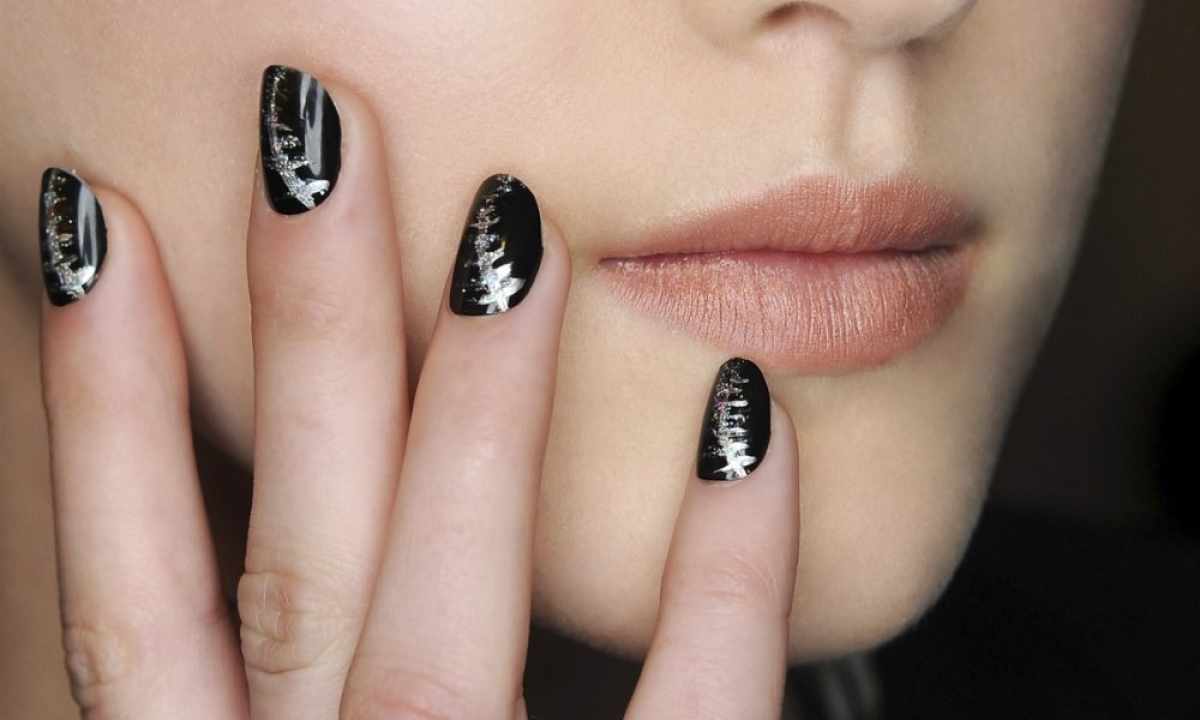
2. Think over the general idea of future manicure. Short nails beautifully look with varnishes of dark and saturated colors. Classical bright red, orange, violet, green or blue different shades perfectly look on nails of moderate length. Very effectively look also drama dark tone – from black to dark red. However bright and dark shades demand ideal quality of manicure.
3. If you are not sure of the skill, try varnishes of quieter tones. Very beautifully the light shades which are brought closer to tone of body – beige, pink, cream and golden look. Selection of color depends on your taste and shade of skin. Not to be mistaken, experiment, having made up one nail on test. If color is pleasant to you, use it for all fingers.
4. The quite good idea – the combined manicure. You can make up all nails varnishes of different shades of one color, trying to obtain effect to degrada. Or to paint contrast color only one finger – average or anonymous. Try unusual combinations – gray-brown with blue or copper-colored with gold.
5. Having decided on design, start painting of nails. Establish hand more conveniently. It is the best of all when your fingers stand on table, and the brush freely hangs down. Provide good lighting, otherwise you will not be able to watch quality of putting varnish.
6. Gather varnish on brush. Remove surplus, having easily carried out on bottle neck inside. Lower brush surface nails closer to its basis. Slightly push it back – the bristle will rest against cuticle, and you receive accurate contour of nail in its most problem part. Now carry out by brush towards nail tip. Dip brush into bottle once again and two movements paint over side surfaces. Act quickly until varnish has begun to dry up. If you are not sure that you will be able to apply varnish accurately, do not bring brush to cuticle and sides of nail. It is better to leave them unpainted, than to smear fingers.
7. Dry the first layer and start drawing the second. It will disguise bald spots and gleams. If the saturation of color does not satisfy you, it is possible to put the third layer. It is important to dry carefully nails after each drawing, otherwise the brush will leave traces on not stiffened varnish.
8. The additional decor can become the next stage. You can decorate varnish with the spangles put at the nail basis. They are very beautifully combined with saturated flowers – dark brown, wine-red, dark blue or violet. Dip brush into bottle with brilliant varnish and wipe it about neck inside almost dry. Put with moist brush several short vertical strokes at the nail basis, trying to obtain effect of hoarfrost.
9. The top covering will become final layer. You can choose top with gloss, with opaque or semi-gloss effect, covering with shimmer (small spangles) or the universal remedy which is protecting and quickly drying varnish. To short nails very much there is mirror luster therefore look for bottle with mark "Diamond gloss" or "Super-shine". Put it over varnish and carefully dry. Effective manicure is ready.