All in the fresh air know about advantage of a dream, and mothers try to walk with the child as much as possible. At the same time it is very important that the kid in a carriage did not freeze, he, unlike the child of more advanced age, lies not movably. The carriage should be warmed, and it is the for this purpose best of all to make an envelope. It can be sewed, for example, from an unnecessary fur coat, even the nursery will approach. If near at hand there is no fur which could be used, make an envelope of a flannel with sintepon.
It is required to you
- - old fur coat;
- - from 1.8 to 3.6 m of a flannel depending on width;
- - linen elastic band;
- - sewing machine;
- - needles, threads, scissors;
- - paper for a pattern.
Instruction
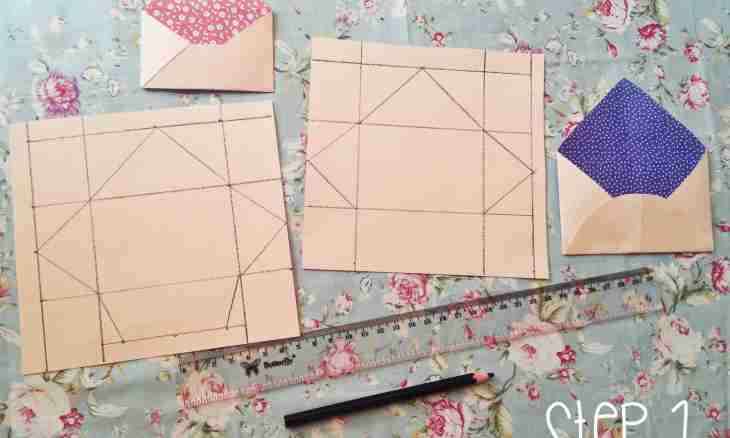
1. Measure an internal part of a carriage. The envelope has to be located and not be wrapped freely in it at the edges. Draw on paper a rectangle with the parties equal to length and width of an envelope. Draw a pocket pattern. It represents a rectangle which width is equal to width of an internal part of a carriage, and length — on your discretion. It is possible to make a pocket only for the child's legs, and it is possible to make it long that only the head outside looked out.
2. You will find that material details from which you will sew. If you do a fur envelope, you need to make 1 detail of "matrasik", 1 fur detail of a pocket and on one fabric detail. Do not forget about allowances. For the envelope sewed entirely from fabric make 2 details. You will find sintepon details. Their quantity depends on quantity of layers.
3. Define from what party there will be a fur. It is the most convenient to make an envelope fur outside, and to sheathe inner side fabric. If there is a soft laying, it will become worse from it not. Put pocket details the faces to each other. Sweep away one of the short parties.
4. Put the turned-out preparation by inner side to each other. At an envelope from fabric iron a seam, at fur it is not obligatory to do it. Sweep together and stitch the line at distance about 2 cm from the available seam. At you the drawstring turned out. Pass in it a piece of an elastic band. Fix it by tailor's pins at distance of 4-5 cm from edges.
5. Put details of "matrasik" the faces to each other. If you do an envelope with heater, then at first fasten layers with several stitches. Impose heater on inner side of one of rectangles and sweep away details.
6. Sweep away and sostrochit one of the short parties of a rectangle and two long to that place where there will be top parts of a pocket. Turn out on the face and iron seams. Iron not closed up cuts in a product.
7. Enclose pocket cuts between layers of "matrasik". Sweep away and stitch together details on the face at distance about 0.5 cm from edge. Pull together with an elastic band the top part of a pocket a little, tack the ends of an elastic band to side edges of a pocket. Fill them in side seams and a zastrochita.