In house conditions it is possible to make beautiful and reliable regiments for books, souvenirs, ware. By means of simple tools it is easy to make angular, wall, floor shelves.
Despite store abundance to pick up really unique subject of interior which will faultlessly fit into design of the room happens not easy. In that case it is possible to make the order at the master or to make thing the hands. Not the exception and wall shelves – is simple to make them, using improvised tools.
Views of wall shelves
Before starting creation of the shelf, it is necessary to be defined what product is necessary for you. Necessary tools and operating procedure depend on type.
- Classical – standard, typical view of shelves. Them it is simple to make with own hands in house conditions, thanks to plain design;
- Angular regiments are carried out in the form of triangle which two parties fasten to different regiments. It is convenient to place them in the bathing or small room where it is necessary to save space;
- Hinged regiments fasten to plain surfaces at the level above the average.
- Floor regiments can stand on legs or fasten to wall slightly above floor. They look as racks and differ in small width.
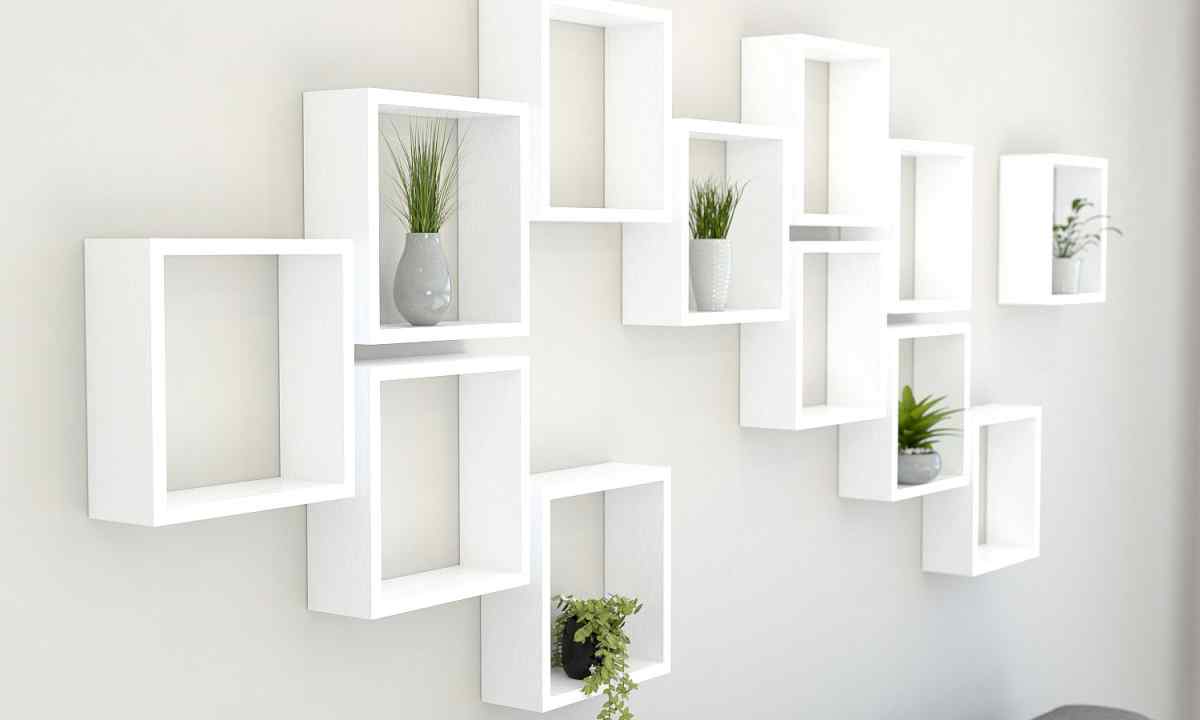
- So call regiments with parts of the different size. It is stylish and original, but at the same time functional element of interior.
- Types and forms of shelves are limited only to your imagination.
Wooden regiments
For the shelf made in house conditions, the best material is tree. Such product will be eco-friendly, strong, safe and stylish. At the request of it it is possible to paint in various colors.
Besides, to work the easiest with tree. Best of all soft breeds of wood, pliable and inexpensive approach.
Before starting assembly, it is necessary to prepare boards. For this purpose grind each preparation, cover with mordant or special solution. If the shelf is going to be painted, process preparation by antiseptic primer. So paint will lay down more exactly, and the product will become even stronger.
Before starting production of the shelf, decide on its location in the room and make measurements. After that it is possible to buy boards or to take the stored houses materials, having filed them.
Tools
From tools it will be necessary for you:
- Fret saw or hand saw. Also the normal wood saw will approach. Give preference to products with small teeths. It is good if you have electrofret saw – with it it is easier to cut preparations for future shelf.
- The grinding machine or various skins for grinding. They will save product from roughnesses, jags, will make surface faultlessly smooth.
- Electric drill. Before twirling the self-tapping screw, it is necessary to drill opening in chipboard or wood.
- The screw driver or screw-drivers will be suitable for small and simple design.
- Self-tapping screws or screws with stubs under color of the shelf not to break unity of style.
- Varnish for tree with which cover finished product. Varnish protects the shelf from damages and gives it stylish look. It is more convenient to use alkyd varnishes which quickly dry.
- Brush of the average sizes for covering it is delicious;
- The square for alignment of corners and equal geometrical form;
- The manual milling cutter will help to make the shelf of even more beautiful, having added to it various parts
Calculations
Having prepared materials and tools, it is possible to start calculations. For production of the wall shelf with the parameters of 100 cm in height we will take board 2 cm thick and self-tapping screws 40-50 mm long in width and 30 cm.
We calculate the sizes. Two side parts on 50 cm are necessary for the shelf 100 cm wide. We calculate parameters of horizontal parts as follows. The flange width is equal to 100 cm, thickness of two sidewalls – on 2 cm everyone. Means, the horizontal part will be equal: 100-(2+2)=96 cm. We calculate height of two vertical parts in the same way: 30-(2+2)=26 cm
Thus from board it is necessary to cut off the preparation everyone 2 pieces:
- 50 cm for side parts;
- 96 cm for the basis;
- 26 cm for horizontal parts.
We collect the wall shelf
First of all each part needs to be processed the grinder or skins. Only after that it is possible to fasten preparations in whole.
We start assembly process. Raise the lower part on 1 cm and in turn fasten to it side parts. You watch that self-tapping screws were located directly.
Then invert preparation upside down and make marks according to position of future shelves. Calculate quantity of cells and separate the basis between them. If cells there are three, then separate board 96 cm long into 3 parts on 32 cm. Recede from sides and put point in that place where the self-tapping screw will be twisted. Fasten to the lower part of point of crossing point.
Now invert the shelf, check arrangement of crossing points and fasten them. Fix sidewalls to the top crossbeam.
That the shelf was equal, record the provision of parts from bottom side flat window corners. This step can be passed if the shelf fastens to back wall.
The design is ready. Now it needs to be painted with mordant and to wait for its drying. After that it is possible to start covering varnish.
Be prepared for this process: clean the shelf from dust and dirt. Put the first layer and check whether there are no fibers in it. If you notice foreign fibers, remove them abrasive abrasive paper. Dilute dense varnish with solvent.
Wait 12 hours and put one more varnish coat. The third layer is put in 20-24 hours. Before covering the following layer check whether previous has dried. Constantly check whether roughnesses, hillocks, grains of sand were formed. Grind them abrasive sponge.
When the last layer varnish dries, fasten loops. Now the shelf can be hung up on wall.
Angular wooden shelf
In house conditions it is possible to make also the angular shelf, and various height and with various number of levels. Let's consider how to make the wooden angular shelf of rails of 20*50 mm.
First of all select the most equal, smooth rails. Parts with large number of knots will not approach. Two frames, each 40*70 cm in size are made of them. You will need to prepare 4 parts 70 cm long and 6 parts on 30 cm. Reliably stick together them, having clamped clamps.
Now we start production of shelves. They can be made type-setting, having connected several rails and having cut out from them parts of the necessary form. It is possible to take the normal veneer sheet laminated by chipboard or equal part of old furniture.
Fasten regiments to frames and cover with several varnish coats as it has been described above.
Fix loops. The set from 2 loops will be suitable for the angular shelf. Hang up the shelf on the place and check result of work.
Regiments for books
Bookshelves – interior part which will decorate the living room, office, the bedroom. If books are not located in cabinet any more, make the beautiful shelf with own hands. For this purpose rails the parameters of 20*40 cm will be necessary for you again. Self-tapping screws on tree of 3.5*45 mm are also necessary (at the rate of 2 pieces on one fixing point).
Besides, prepare the following tools:
- screw driver;
- electric drill;
- electrofret saw or wood saw;
- tape measure;
- construction square.
We start production of the shelf. First of all it is necessary to make short flights of stairs – side parts. If the shelf long, then we prepare also average parts.
Calculate product parameters proceeding from its purpose. There is usually enough width in 20 cm. Height of cells differs at each level.
Prepare rails which will be used as racks. Attach to them cross-pieces, having drilled at the edges of each plate of opening. Having fastened cross-piece the self-tapping screw, check its situation. Then level rail and attach the second self-tapping screw.
Thus, gradually collect short flights of stairs and lay them on the floor. Check correctness of corner and fasten it with rails. Then cut off superfluous, according to design length.
Attach other rails, lift product and attach to wall. Then build in other rails which will act as shelves.
This reliable multilevel design will sustain large number of books.
The hinged shelf on belts
Original and exclusive model which not to meet in shops. The hinged shelf on belts will be suitable as decorative element of interior for small objects.
To make such product, it will be necessary for you:
- 2 eaves boards of 300*750 mm (thickness of 30 mm)
- 4 leather belts 75 cm long;
- 4 long screws with plastic dowels;
- 4 short self-tapping screws;
- construction level;
- ruler;
- sharp knife;
First of all, prepare belts. Their cuts have to be absolutely equal. If necessary cut them with knife. Fold each belt in half, press the ends to table, recede from edge on 2 cm and drill drill accurate opening.
As material for shelves use wood, plywood or sheets chipboards. The last option differs in durability and reliability, but before doing the shelf, it is necessary to process it. For this purpose paste over everything to cut with melamine edge under color of leaf.
Then attach belts to wall. By means of level find and make marks in two points at distance of 60 cm from each other. Drill openings and insert dowels. Fold belt in half, apply to one of openings and record long screw. Has to the big loop will turn out. Attach one more loop nearby.
Establish shelf. For this purpose in both loops push carefully polished board. Check its situation and if it is necessary, level across. That the shelf stood exactly, fasten belts to wall self-tapping screws.
Under the first shelf attach one more, being guided by the instruction above. Thus accurate, light-weight construction from two tiers will turn out. If more shelves are necessary, just add still tiers.