Installation of the hatch on roof of the car is integral part of external tuning. Besides esthetic pleasure, installation of the hatch brings also practical benefits. If you are fond of hunting or the photo, availability of the hatch can simplify your life considerably. And just to sweep with breeze or to admire the night sky happens very pleasantly. Especially as independent installation of the hatch will not take away many forces and time.
It is required to you
- - electric scissors;
- - leaf of Whatman paper;
- - pencil;
- - painting adhesive tape;
- - ruler;
- - screw-driver;
- - drill;
- - carpet hatchet.
Instruction
1. Choose hatch model. There are two types of the hatches suitable for independent installation. These are soft hatches with movable waterproof cloth and rigid - with the glass panel. Glass hatches are lifting or movable. It is necessary to consider that lifting hatches, in difference from movable, practically do not change aerodynamic characteristics of the car. Besides, glass hatches are often completed with additional sun-protection blind. But is at them and the big shortcoming capable it is essential to influence your choice - they are not compatible to installation of trunk on roof of the car.
2. Make sure that the model chosen by you is suitable for your car. If on factory packing of the hatch it is not specified for what models of the car it is intended, it is necessary to consult with the expert. The frame of the hatch restores stability of body after cutting opening in it. It is necessary to consider that at each model the frame has individual curvature.
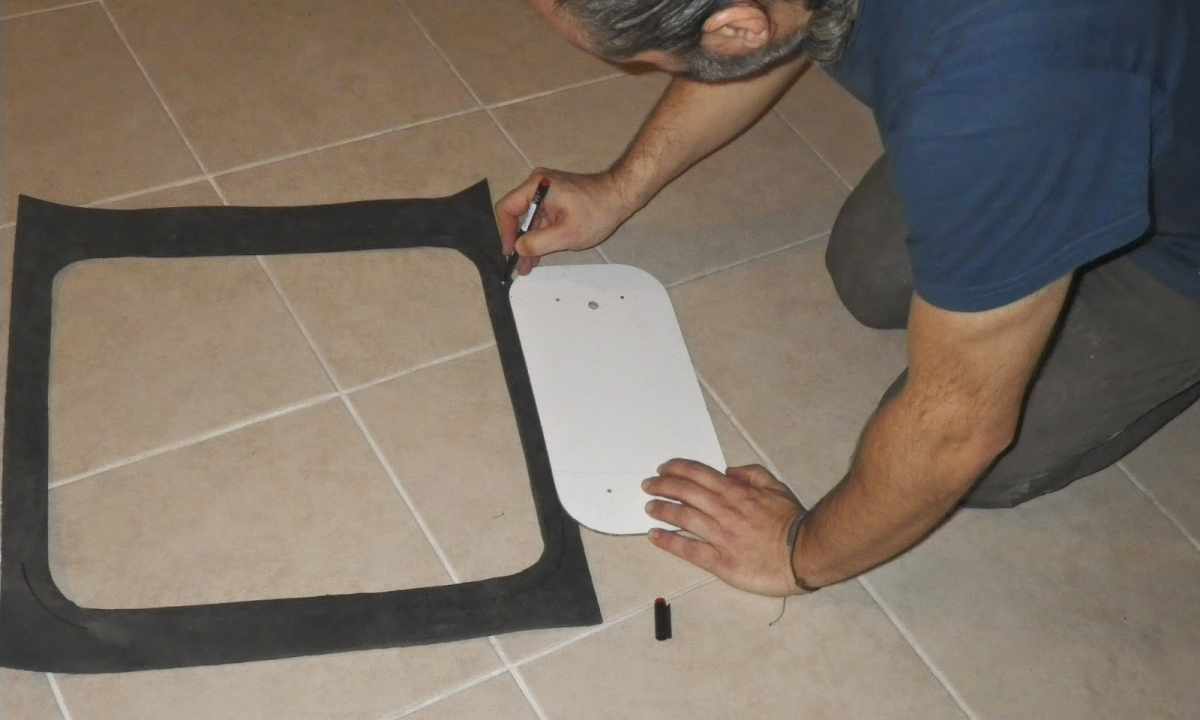
3. Make hatch opening template. For this purpose take leaf of Whatman paper and cut in it the opening corresponding to the sizes of your hatch. It is necessary to pay attention that the opening has to be symmetrized concerning leaf of Whatman paper. Paste over roof of the car with painting adhesive tape and apply template. Defining position of the hatch, it is necessary to consider that he has to settle down at distance of 20 cm from machine windshield.
4. Define arrangement of stiffening fins outside of and from within the car. For this purpose it is necessary to cut opening in covering of the car and to carefully probe its roof. Also it is worth paying attention to arrangements of cable.
5. Apply template to roof of the machine from within and by means of the screw-driver plan its center.
6. Lay template outside, being guided by the made mark. Align template to the center of roof of the car by means of ruler. Circle it with pencil.
7. Drill opening in order that it was possible to insert electric scissors. Accurately cut through aperture for the hatch. It is necessary to consider that the cut aperture has to be 2 mm more than the hatch frame sizes.
8. Cut internal covering of the car by means of carpet hatchet. The aperture in covering has to be more, than external. It is necessary in order that reciprocal part of frame nestled directly on metal.
9. Establish frame with sealant from outer end of the machine. Press internal part of frame. Make sure that the frame lies exactly and tighten screws. When the crank handle rises into place in facing of frame - work is finished.
10. Tire out the machine on washing and make sure of tightness of your hatch.