Creation of an isometric projection of a detail allows to get the most detailed idea of spatial characteristics of a subject of the image. The isometry with a cut of a part of a detail in addition to appearance shows the internal device of a subject.
It is required to you
- - set of drawing pencils;
- - ruler;
- - squares;
- - protractor;
- - compasses;
- - eraser.
Instruction
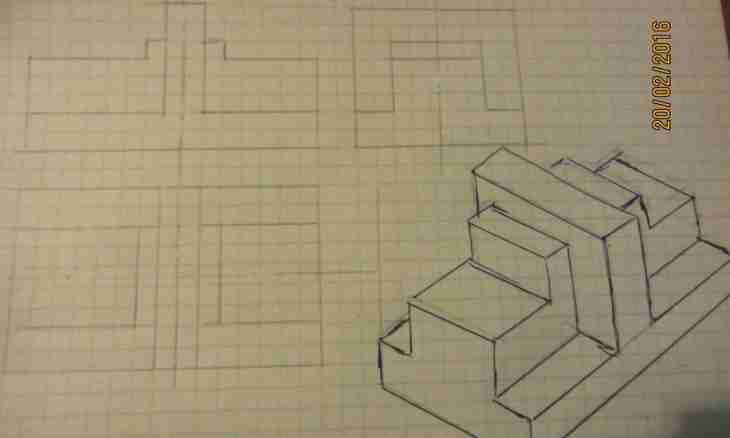
1. For creation of the drawing in an isometry choose such arrangement of the represented detail or the device at which all spatial characteristics will be most visible.
2. After the choice of arrangement decide what type of an isometry you will carry out. There are two types of an isometry: rectangular isometry and horizontal oblique-angled isometry (or military prospect).
3. Draw axes thin lines so that the image was placed on the center of the sheet. In a rectangular isometry the corners between axes make hundred twenty degrees. In a horizontal oblique-angled isometry the corners between axes X and Y make ninety degrees. And between axes X and Z; Y and Z — hundred thirty five degrees.
4. Begin to carry out an isometry from the top surface of the represented detail. From corners of horizontal surfaces draw vertical lines down and postpone on these lines the corresponding linear sizes from the drawing of a detail. In an isometry the linear sizes on all three axes remain multiple to unit. Consistently connect the received points on vertical lines. The external contour of a detail is ready. Execute images of the openings which are available on sides of a detail, grooves and so forth.
5. Remember that at the image of objects in an isometry the visibility of curvilinear elements will be distorted. The circle in an isometry is represented as an ellipse. The distance between ellipse points on axes of an isometry is equal to diameter of a circle, and axes of an ellipse do not coincide with isometry axes.
6. If the subject has hidden cavities or complex internal structure, execute an isometric projection with a cut of a part of a detail. The cut can be simple or step depending on complexity of a detail.
7. All operations have to be performed by means of drawing tools — rulers, a pencil, compasses and a protractor. Use several pencils of different hardness. Firm — for thin lines, it is firm - soft — for dashed and dash-dotted lines, soft — for the main lines. Do not forget to draw and fill the main inscription and a frame according to GOST. Also creation of an isometry can be carried out in the specialized software, such as Compass, AutoCAD.