Kids in hot season like to spend time in a sandbox which can be got in shops. For a qualitative wooden sandbox it is necessary to give the large sum, but if you are not afraid of work, then it can be made all the hands. There are several options how to make with own hands a sandbox at the dacha. We suggest to stop on option with a cover which will save from pollution and will give to functionality.
How to make with own hands a children's sandbox?
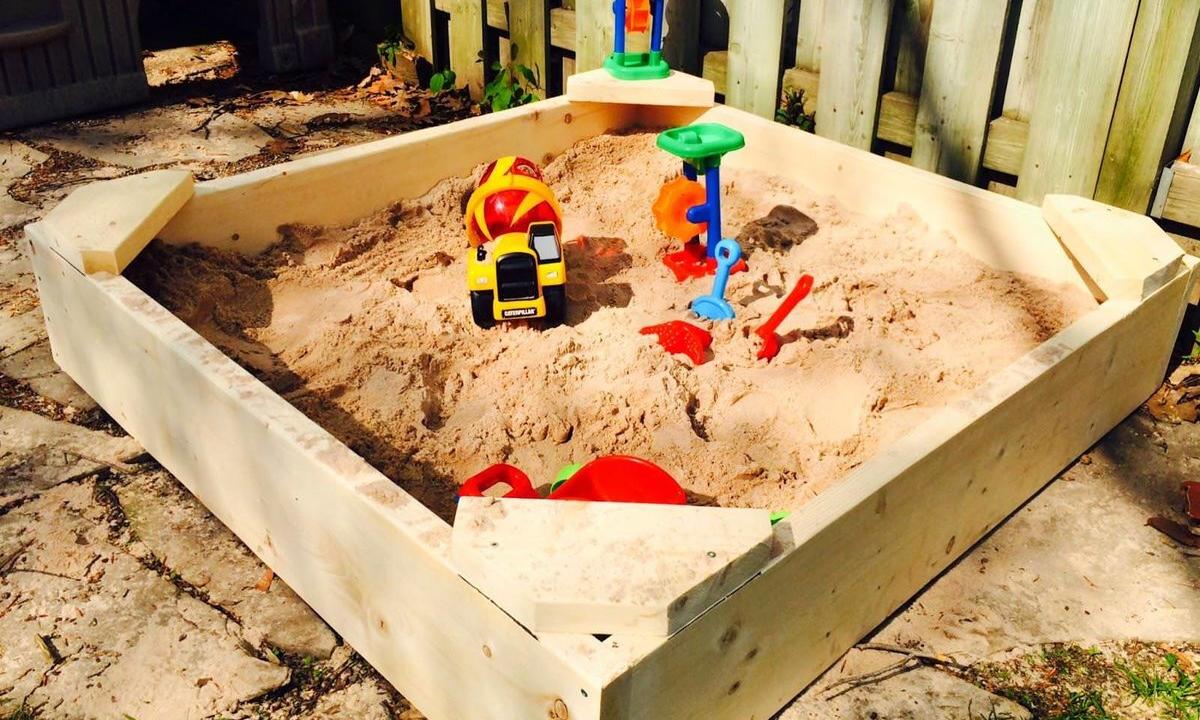
For a start it is necessary to decide on the place for a sandbox. Try that a part of future design was in a shadow, and a part in the sun. If there is no such opportunity, then it is possible to make a roof. Choose the West or South side. After that it is necessary to decide on dimensions and the most optimum the square shape with the parties of 1.5 m is considered. Let's do a sandbox by the hands, using two boards 25 cm wide. The kid himself will be able to master such height and in 10-15 cm there will be enough layer of sand.
For work it is necessary to prepare two boards 32х120х6000 to make a framework and two boards 20х120х6000 for a cover. Still will be necessary: loops, agrofibre, impregnation, self-tapping screws and other details.
As the hands to construct a sandbox at the dacha:
- Saw boards on a part, and then, surely smooth out them that they were ideally smooth and children did not get a splinter. The plane best of all will be suitable for this purpose. That the sandbox served long time, boards need to be processed surely an anti-septic tank.
- When they dry, fasten 4 boards that two identical squares turned out.
- After that it is possible to pass to a bottom which will save a sandbox from insects, the grass and the child will not get to the bottom of the earth. Use dense agrofibre which perfectly passes water. Attach it, use the furniture stapler or nails.
- The place where there will be a sandbox, has to be absolutely equal. Establish on it the lower part of a framework. On the top face paste sealant which is important in order that through cracks sand did not pour out.
- For fastening of side parts, use bars which need to be beaten in corners. By the way, do not forget to process them an anti-septic tank. Take the screw gun and self-tapping screws or nails for fastening.
- To make with own hands a children's sandbox with a cover, take the prepared boards. The cover will be not simple, and to consist of two parts: table and shop. To make a table, beat one board to the sandbox, and attach another to it, using loops. Opening and closing one half, it will be possible to increase or reduce the table size.
- We pass to a bench which consists of six boards which form a back, a seat and fastening to a sandbox. Fix them in pairs, using bars, and parts of a bench connect loops. It is important to connect boards to a gap that water did not accumulate on a cover, and to sand air got that will not allow to be formed to a fungus. The functional cover is ready.
- It was necessary only to paint a sandbox, using special paint. It is possible to add different drawings, for example, florets, butterflies, etc. After drying up fill a sandbox with river or quartz sand which previously surely sift.
If you want to make with own hands a sandbox with a roof, then it is possible to add a ready construction with a simple canopy. It is necessary to make four racks which can be made of a tree or metal. Arrange them on corners, having hammered or having driven in the earth that they were motionless. On racks it is necessary to pull any swore or it is possible to attach on them a piece of plastic, using self-tapping screws.