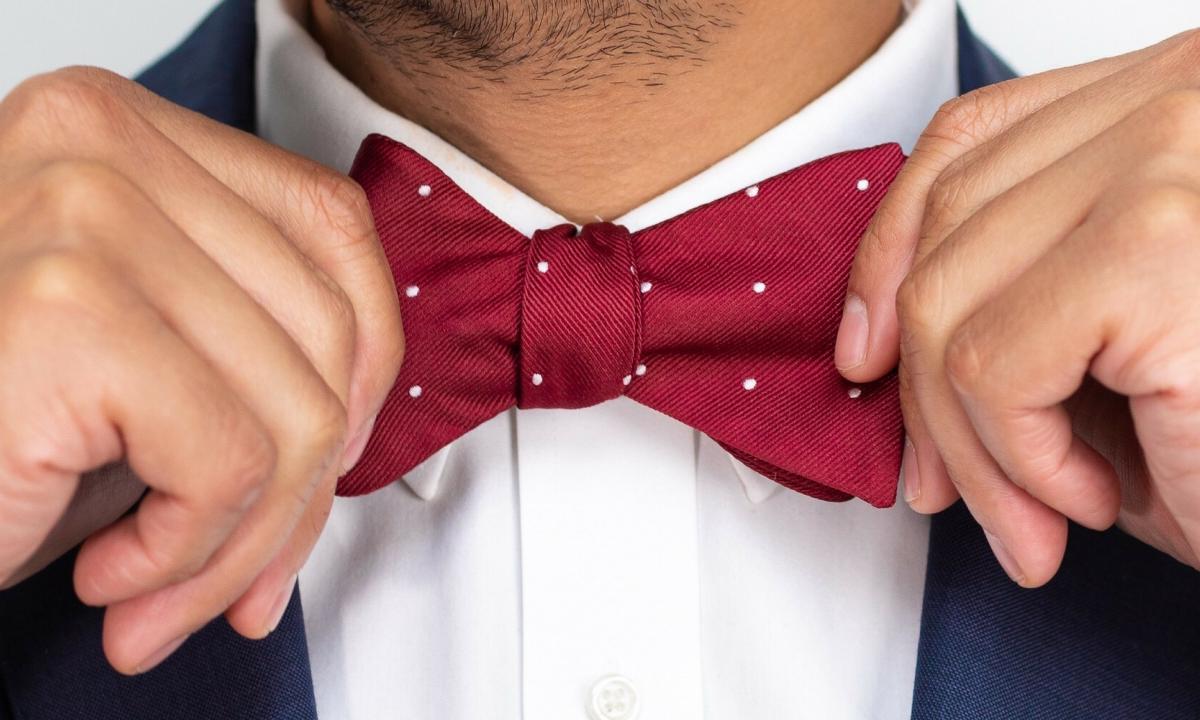
In the modern world increasing number of men prefer classical, official style of clothes. For someone such choice is the compulsory measure connected with the place of employment, someone just does not represent the image without stylish trousers, shirts and jackets. In both cases an integral part is the accessory in the form of a tie, so, it is very important to know how to tie a tie it is correct that it beautifully looked, corresponded to a case and age. In this article we will tell how to tie a tie step by step, and the scheme and a photo will help to put easily ways into practice.
Simple knot
The simple knot — an optimal variant for a campaign for work or for those cases, when there is no an opportunity to spend is a lot of time for collecting. Sposobov exists a huge set, and further we will consider the main and the most popular of them.
Pratt
Pratt is one of the easiest and universal ways to stick a tie. The employee of United States Chamber of Commerce Gerry Pratt thought up it. Also it still call Shelby or American. Best of all is suitable for shirts with the rounded-off tips.
- For a start it is necessary to slip necktie fabric outer side on that seams were outside. At the same time a narrow part has to be located at the left and extended on level slightly below than a navel, and that, what is wider — on the right, with it and will be carried out the subsequent work.
- It is necessary to place the wide end under narrow, having formed a cross hairs then it reaches for a neck and is passed over the created necktie loop, being extended at the left.
- Then the front side of Pratt is formed. For this purpose it is necessary to lay fabric from left to right.
- It is necessary to stretch once again to a neck necktie fabric and to pass under the created loop then it is passed on the knot face through earlier made loop.
- It was necessary to pull the end down, accurately tightening a design. The simple and stylish Pratt node is ready!
Kent
This node is considered classical option which is suitable for men of any age and status. It is harmoniously combined with shirts with a tight collar.
The following instruction will help to tie a tie in such a way:
- It is necessary to place fabric on a neck seams outside. The narrow end has to be located at the left.
- At first the right part needs to be stretched under left then to embrace it on the left side a wide part.
- The same end is stretched in space between fabric of a tie and a neck in the direction up.
- In conclusion the end of fabric which is wider is stretched from above in the direction down through knot which was formed by the narrow end of fabric of a tie on the face. The knot is regulated for comfortable carrying.
Prince Albert
This tie knot is compact and is well combined with shirts with a long collar.
It is important! To give to showiness to a tie knot Prince Albert, it is necessary to clamp fingers the wide end of fabric at distance 5 cm under knot so that two vertical folds were created. Gradually tightening knot, they are fixed. It is so possible to receive an effective dimple.
The accessory has to be narrow, it is desirable is sewed from soft types of fabrics (for example, from silk).
- Necktie fabric gives all the best the face up.
- The ends cross so that a narrow part was from below.
- The top end needs to be made two turns around thin, then to pass from below up from the inside of a cervical loop.
- After that the same part of an accessory is stretched waters by the top layer of knot.
- The knot accurately drags on, finishes between shirt collar corners.
Windsor
The Windsor node remarkably is suitable for shirts with an average collar and also for collars with soft corners.
- Necktie fabric attacks on a neck seams down. The narrow end has to be at the left.
- Thin part is extended on level a little above a navel, and further work is conducted with a wide part.
- The ends of fabric cross so that narrow fabric was from below.
- It is necessary to pull that part which is wider, to a neck and then to pass over a necktie collar.
- Having made one turn around a collar, fabric is extended to the left and laid under the thin end of necktie fabric on the left side in right.
- The end of a tie reaches for a neck again and is passed over a necktie loop then it is extended to the left.
- Shifting horizontally necktie fabric from right to left, the front side of a tie knot is formed.
- The wide end reaches for a neck and is passed at first under a necktie loop, and then through a loop on the face of the created knot.
- It is necessary to pull the end of an accessory down, slightly tightening to receive ready Windsor.
Poluvindzor
This way well looks not only with silk or woolen fabric, but also with easier types of material.
Whether you know? The studio of design Satya Paul Design Studio from India created the most expensive tie in the world. It cost 220 thousand dollars and was decorated with 150 grams of gold and 271 diamonds.
It is combined with classical collars of shirts and with the open divorced corners.
- Wide part of necktie fabric snatches on narrow, crossing fabric, and is fixed by fingers.
- Then it is translated over narrow and passed throughout a cervical necktie loop.
- Now the bridge is formed, translating a wide part again from left to right.
- The knot bandage in a cervical loop of the wide end of a tie and its drawing in the created gap comes to the end with a podsovyvaniye.
Quarter
The quarter tie knot which is called still Italian and ancient German ties as follows:
- Fabric attacks on a neck, then crosses so that more extensive part was over narrow.
- The front side of knot by reversing of a narrow part of fabric wide is formed from left to right. It is necessary to spread fabric horizontally.
- That part of fabric which is wider lasts up and is passed throughout the created throat loop.
- Now it needs to be stretched in a loop which was formed on the face and to pull, slightly tightening, down.
The knot is ready! It looks a little asymmetrically that will give to easy negligence to an image, but at the same time elegance.
Kelvin
To receive the Kelvin node, it is necessary to carry out such manipulations with necktie fabric:
- Necktie fabric inner side ties round around a neck so that an extensive part was located on the left side.
- The ends are crossed, sending a wide part to the right side and then carrying out it under the narrow end of a tie.
- The same part is stretched to the left, imposed over narrow.
- Now it needs to be stretched to the right, carrying out under a narrow part then again over the narrow end to pull to the left.
- It is necessary to spend from below up the wide end of a tie from the inside through a loop and to stretch in the top ear from those which were formed.
- The wide end is stretched at the same time through two ears.
- The tie drags on, finishes.
Difficult knot
Difficult knots what tells the name about, demand a little more time in comparison with simple and also it is a little skill. Nevertheless they look very stylish including due to complexity of the design.
It will be interesting to you to learn about how it is worth spraining sleeves on a shirt.
Baltyus
This type of knots is one of the largest by the size.
Whether you know? The knot received the name Baltyus (or Baltus) in honor of the artist from France Balthasar Klossowski who had Polish roots.
Not to receive too big knot and also too short accessory, the accuracy and scrupulousness is required. In this regard it is better to choose ties long and narrow. Fabric has to be easy.
- Necktie fabric inner side outside gives all the best on a neck. The wide end is located on the right.
- The narrow region keeps within over what is wider, and extends down, then is passed under a collar which was created after crossing.
- Wide part is carried out behind a collar then lasts to the left.
- The narrow end is stretched over again created collar towards a neck.
- The end needs to be passed under a collar more widely and to pull to the left.
- The narrow end is again stretched towards a neck over the formed collar.
- Wide part is passed under a collar and conducted to the right.
- To create the knot face, it is necessary to lay a narrow part of a tie from right to left then to pass under a collar and through a loop which appeared on outer side.
- In conclusion a wide part carefully lasts down, the ready knot finishes.
Eldridge
Eldridge is a knot which will fit into official style only in the absence of a strict dress code.
It looks originally and unusually. The accessory should be used monophonic or that which has the simple drawing and texture. Otherwise the knot will look gaudy and inaccurately. The same concerns also a shirt. It has to be monophonic too, and not bright, striped or multi-colored.
The tie surely has to have good length, otherwise it will not be enough for all necessary manipulations.
It should be noted that to carry such knot not easy. It is necessary to be ready to the fact that the faultless type of an accessory can be spoiled one awkward movement which can violate the structured laid-out drawing of knot. The Eldridge node as follows ties:
- Necktie fabric is located over a collar. It is necessary to leave a wide part to hang at once at that level at which it has to be at the end.
- Both ends of a tie cross so that narrow was from above.
- Narrow part of a tie is got for that, what is wider, and lasts at first from left to right then — forward and upward.
- It is necessary to pass it through a cervical loop down and then again to stretch from left to right, but this time already over a wide part and then to get the narrow end for wide again to pass it to the right.
- As a result, if everything is made correctly, in the left side the diagonal crossing point has to turn out. The tip of a narrow part of a tie needs to be inserted into it and to stretch aside that the knot dragged on.
- Narrow part is passed from top to down through a cervical loop, then rises up and is again stretched through a loop down.
- Once again a thin part is inserted into a cervical loop and passed through it from top to down so that it left on the other hand as if bending around the wide end of a tie.
- The small loop which is located on diagonal is sideways formed. It is necessary to insert a narrow part of necktie fabric into it and to extend aside.
- In conclusion the remained short tip of a narrow part needs to be hidden for a collar and to straighten ready knot.
Whether you know? The United States of America sell every year about 100 million ties that is equivalent to 1 billion dollars.
Trinity
The Trinity node looks also unusually, as well as Eldirdzh. There was it relatively recently, but already managed to find popularity among fans of ties. In the finished look he reminds trikvert — a pagan symbol. Having tied such tie, the man will not remain unnoticed, and will surely draw attention of people around and will be allocated from the lump of people. It is necessary to throw a neck with necktie fabric seams inside, at the same time that part which is wider, has to be at the left. It at once needs to be extended on the necessary level, length will not change further.
- The cross hairs is formed, the narrow end is located from above.
- It is necessary to pull a narrow part to a neck and to pass it under the formed necktie loop.
- It is necessary to wrap up a collar of necktie fabric once and to pull out the end to the left side.
- Now it is necessary to wrap up a wide part of a tie from left to right.
- Narrow part reaches for a neck, is passed under a necktie collar, once is wrapped around it and it is pulled out to the left.
- Part of fabric which is wider is shifted horizontally from left to right and passed under a tie collar. Thus the front side of a tie knot will be created. The narrow end lasts through the created loop down.
- It is necessary to wrap up a wide part of necktie fabric narrow from left to right, and then to stretch it through a loop which was created earlier, slightly tightening knot.
- Narrow part remains at the left and hides under a collar. The Trinity node is ready!
Undoubtedly it will be useful for men to learn about how quickly and correctly to grow a beard, it is fashionable to tie laces and as it is correct to put on on an interview.
Van Ueyk
To tie a tie the way Van Ueyk it is necessary to make the following:
- The tie gives all the best on a neck seams inside. That part which is wider has to be located on the right. The narrow end is initially extended on level a little above a navel. All further manipulations will be carried out with a wide part.
- At first it is necessary to create a cross hairs, a narrow part is from below. A narrow part needs to be wrapped up in that, what is wider, from left to right.
- Front part of knot is formed by horizontal shifting of the wide end of a tie from right to left.
- It is necessary to wrap up the thin end in what is wider, from left to right and then the second time to create a front part of knot, shifting a wide part to the left side.
- The previous action needs to be repeated, having wrapped up a wide part of a tie one more time, but is a little lower, than the previous two times.
- The wide end a tie should be pulled to a neck and to pass under a necktie loop, then to pass through loops on a front part of knot which were created earlier. In conclusion the end of a tie needs to be pulled down, tightening a little.
Myurrell
Myurrel differs from other options in the fact that a thin part of a tie will be over that, what is wider that will always unusually look and draw attention.
The tie is placed over a shirt so that the wide end was at that height where it has to be finally.
Important! Over a wide part of a tie narrow will be located. It should be considered and tracked that the wide end was longer.
- The ends of a tie need to be crossed, a narrow part is from above.
- The narrow end needs to be got for what is wider, and through a cervical loop to extend it up, and then to lower down.
- Now the narrow end is repeatedly got for wide and stretched on the left side in right.
- The narrow end needs to be stretched through a cervical loop from top to down.
- Action should be repeated, but now on the other hand.
- Narrow part of a tie needs to be passed in front from that that more widely, from left to right, then to get for it and to stretch through a loop of a necktie collar.
- In the place where the knot is formed, the horizontal crossing point has to be created. It is necessary to insert the narrow end of a tie into it and to stretch it down.
The ready knot needed to be tightened to a shirt, to tighten and straighten for comfortable carrying.
Councils and recommendations about the choice of a tie
About that, it is how important to pick up the correct accessories, for a long time do not argue. It correctly concerns also ties. It can harmoniously finish an image, bring a note of originality or, on the contrary, at all spoil a situation. Let's understand highlights which will help not to lose and always to make a right choice:
- It is recommended to choose a tie which is one tone more dark than a shirt and at the same time is lighter, than a jacket.
- If a suit from thin knitwear, a tie it is necessary to select silk if woolen — a wool accessory. It is not recommended to combine fabrics of the different invoice because there is a risk to look ridiculous.
- Bright tie — quite admissible option for a holiday or other action, but not for office. Choosing bright color of an accessory, the shirt and a suit have to be quieter color and monophonic.
- Usually ties have width about 8-11 cm. For men with a battle size it is admissible to choose also models to 13 cm.
As for prints, each man is free to choose to himself that he most of all is pleasant to him. It should be noted that tall slender men will suit models with the horizontal drawing, high and full more — geometrical patterns. Men of low growth can choose monophonic ties or with a vertical ornament. It is enough to follow some rules when choosing a tie and also to learn technology of setting of knots, and the image of the man will always be ideal. It is necessary to remember that the tie is not only classical style. He will remarkably fit into clothes with jeans and absolutely not classical jackets. It is worth including imagination and to experiment.