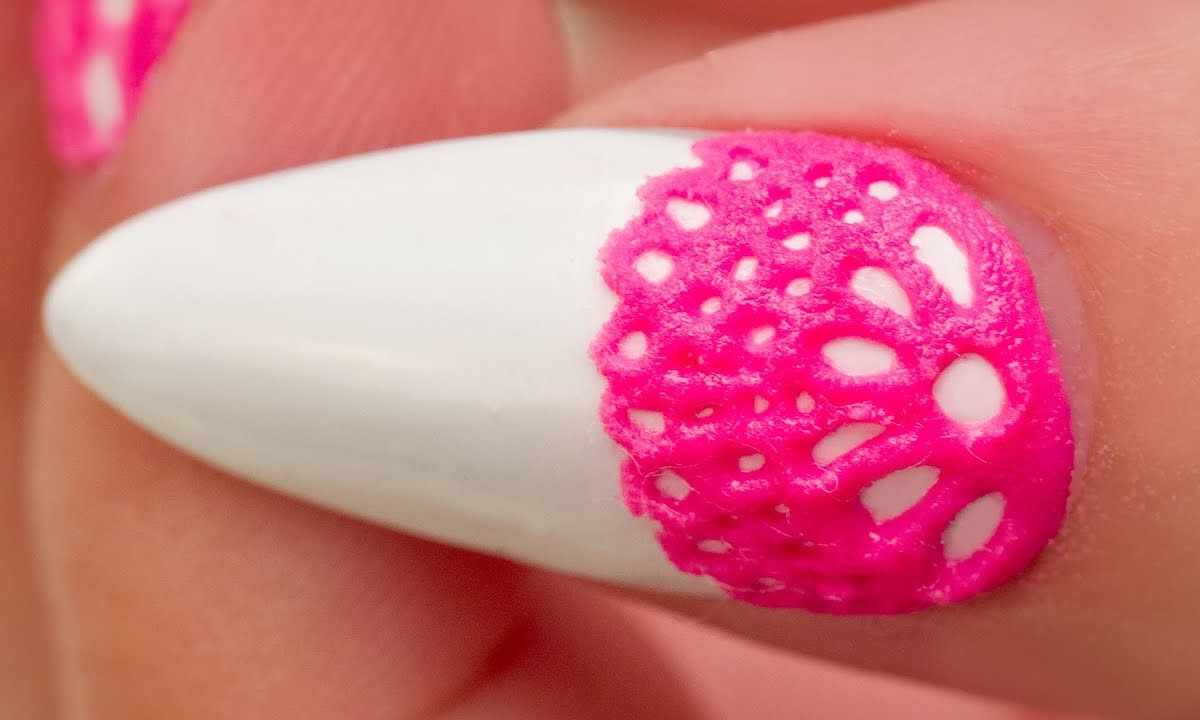
The design 3d gel becomes popular again. In this master class the option not of so difficult, but very unusual and beautiful design is shown. Such lace will decorate your nail and will make unforgettable impression on people around.
It is required to you
- - nail buffer
- - primer
- - base
- - glossy top
- - color gel polish
- - 3d gel
- - rhinestones, or pixels
- - shovel, or orange stick for intake of 3D gel from jar
- - dots
- - klinser or other liquid for removal of stickiness
- - flat brush for distribution of 3D gel
- The sample is shown on tipsa, but the description is given as this design becomes on nail.
Instruction
1. Standardly we prepare nail. We remove gloss nail buffer, we process primer. We cover with base - we dry in lamp. Further we put two layers of color gel polish, in this case light pink. We dry both layers in lamp. We cover with top, we dry and we remove sticky layer.
2. We take small ball of 3D gel. To get it conveniently flat rake or orange stick. We distribute it on all nail. The layer should not be thick, we do it to the thinnest, but also transparent it should not be too. To distribute 3d gel conveniently for finger, slightly pressuring him. But if you have allergy to material, then it is possible also the flat brush moistened in klinser.
3. Further dotsy we plan contours of future lace. Superfluous we remove orange stick, it is convenient to clean the remains the flat brush moistened in klinser.
4. It has to turn out approximately as on photo.
5. Dotsom we squeeze out flower on the one hand.
6. On the other hand.
7. We press through ruches of future lace on edge.
8. Where there are sites which are not filled with pattern, press through points and other simple ornament.
9. When the pattern is finished, in the center of florets it is possible to put small rhinestones or pixels. We dry in lamp. Lace is ready!!!